;
English
English

Installation instructions

Installation instructions

Installation instructions

Installation instructions

Installation instructions

kaarid Scissors or sharp knife

maalriteip Scotch tape

spaatel Spatula or bank card

moodulint Ruler

       12

nr-1  Thoroughly clean the surface from dust and grease. Secure the sticker to the surface (in the area you wish to put the picture) using scotch tape.
 kleebise-paigaldusjuhend-1-1 kleebise-paigaldusjuhend-1-2
nr-2 Cut one end of the mounting film from the paper. While holding the mounting film, cut the paper with scissors and glue the mounting film together with the sticker onto the surface.

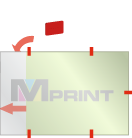
NB! When putting the sticker on use a spatula or a bank card to avoid the occurrence of bubbles.

kleebise-paigaldusjuhend-2-1 kleebise-paigaldusjuhend-2-2

 nr-3 Cut the unwanted mounting film from the part where the sticker is already put on. Then smoothly peel off the paper from the sticker (so that the sticker will remain on the mounting film).

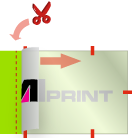
NB! This example illustrates the installation of a smaller sticker when it is easier to remove the entire sticker from the paper at once. In case the sticker is bigger, the paper needs to be removed step by step.

 kleebise-paigaldusjuhend-3-1 kleebise-paigaldusjuhend-3-2 
nr-4 Glue the mounting film with a sticker on the surface, using a special spatula (squeegee) or bank card.
kleebise-paigaldusjuhend-4-1 kleebise-paigaldusjuhend-4-2
nr-5 Smoothly remove the mounting film so that the sticker remains on the surface.
kleebise-paigaldusjuhend-5-1 kleebise-paigaldusjuhend-5-2
Tools needed Frame for stickers


Send a request and get a price offer

    Choose files for upload